
Add a document from your computer
The basic upload path — Capture New > Electronic — including the Index Fields choice that decides whether the document files immediately or waits in the Coding Queue, and when the Folder Browser's multi-file upload is the better tool.
At the end of this guide you can upload a file into Content Central two ways — the Capture page for one document with full control over its indexing, and the Folder Browser for many files into a folder at once — and you'll know which to reach for.
The Capture page: one document, full control
In the left menu, expand Capture New and choose Electronic. The Capture Document page opens.
noteAn administrator can hide capture types your organization doesn't use, so your Capture New menu may show fewer entries than a colleague's.
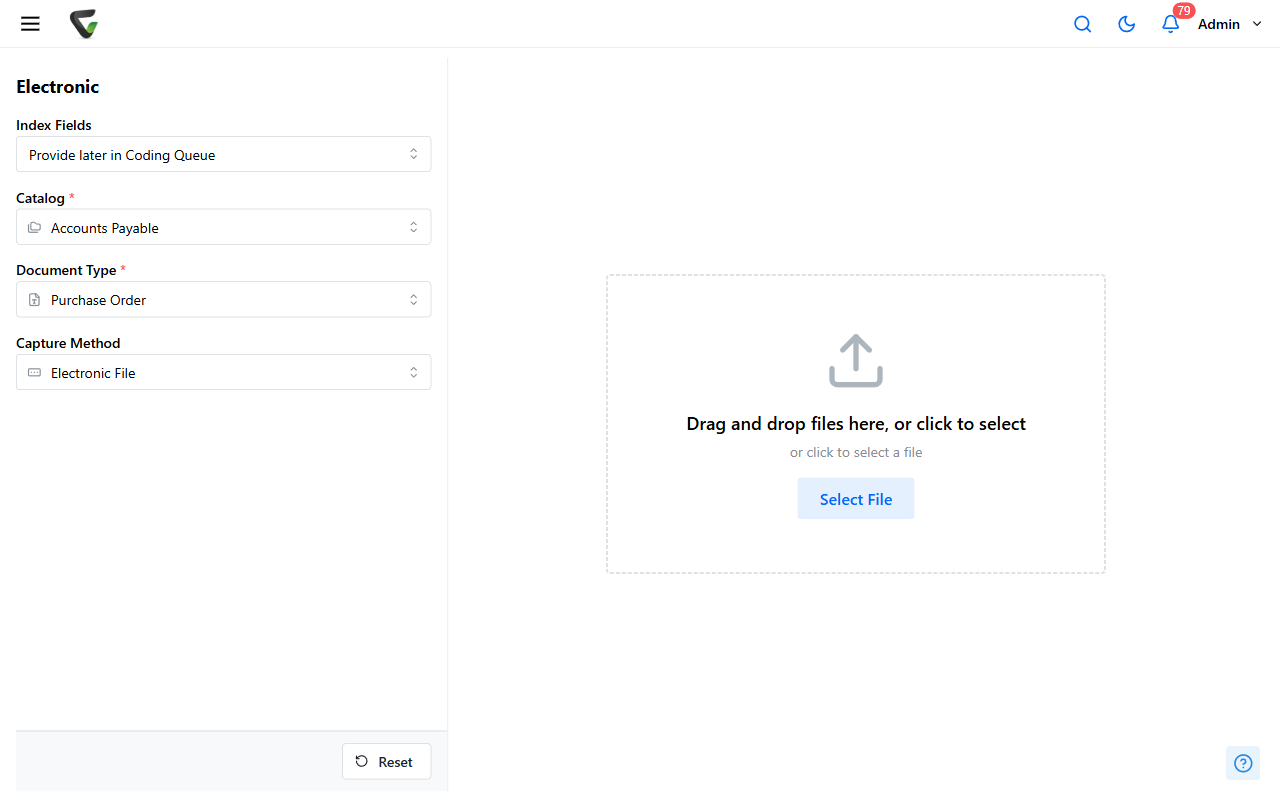
Set Index Fields — the choice that decides when the document gets its field values, and therefore where it goes next:
Choice What happens Provide now You fill in everything here; the document files directly Provide later in Coding Queue The document waits in the Coding Queue for someone to index it Provide some now, some later You fill part here, the rest happens in the queue — and a Destination choice appears: Your Queue or Shared Queue Provide only Catalog & Document Type No field entry at all — capture and move on
Pick the Catalog and Document Type. If you chose to provide values now, the type's fields appear grouped as Required Fields and Optional Fields.
Add the file: drag it onto the panel that says "Drag and drop files here, or click to select", or click Select File. This page takes one file at a time — that's what keeps per-document field values possible.
Click Upload. A progress bar runs, then Upload complete — and the button becomes Capture Another Document for the next one.
A few edges that only show themselves when hit: files over 2 GB are rejected with a message saying so; an administrator can block specific file types ("This file type cannot be uploaded. Contact your administrator for details."); and depending on system settings, uploading a PDF may ask whether to capture it as-is or make it text-searchable first.
The Folder Browser: many files, one folder
When the job is "get these fifteen files into that folder," skip the Capture page:
Open the Folder Browser and navigate to the target folder.
Drag the files straight onto the document list — the drop target announces itself with "Drop files to upload" — or use the folder menu's Add Documents.
In the Upload Documents window, Add Files accepts multiple files at once. Pick one Document Type, fill in the fields under Document Fields (applied to all files), and click Upload.
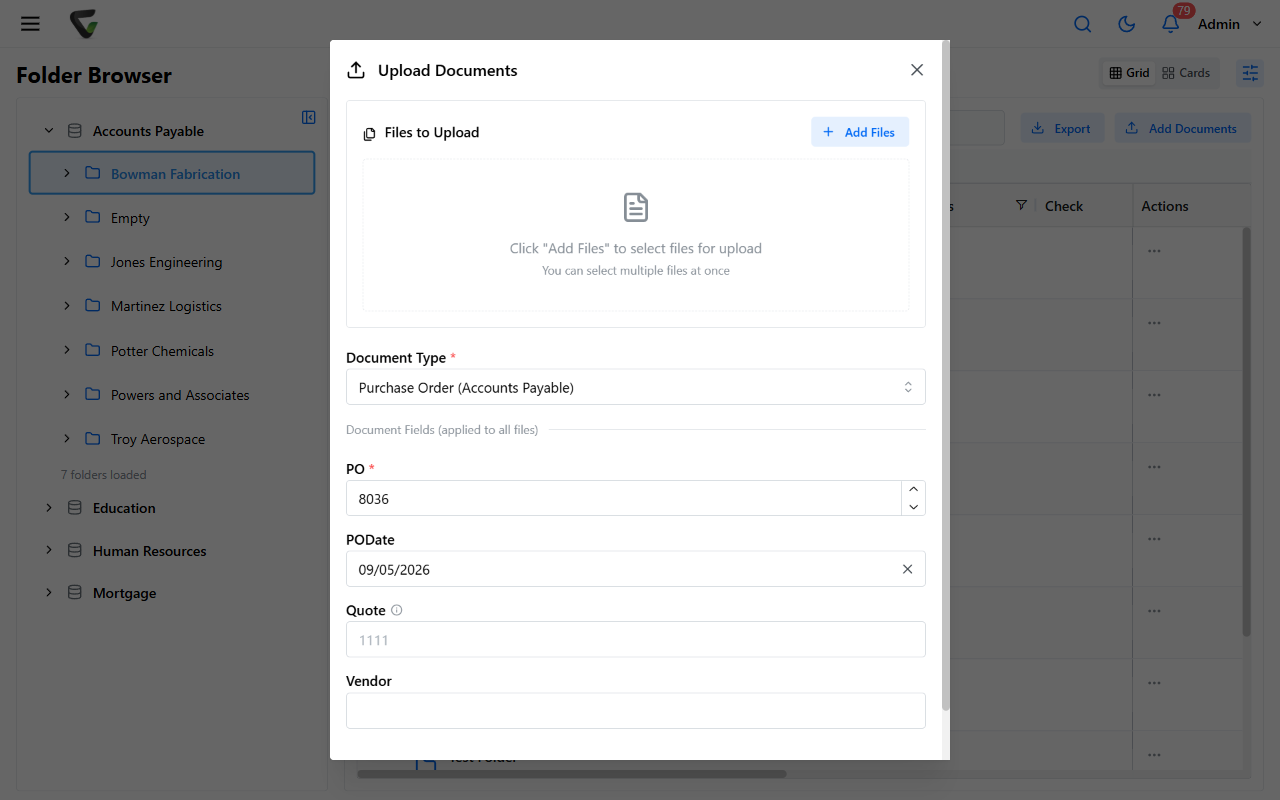
The trade is explicit in that heading: one document type and one set of field values applied to every file in the batch, filed into the folder you're standing in — no Coding Queue routing, no per-document values. Perfect for a stack of same-kind documents; wrong for a mixed pile that needs individual indexing.
If the drop target instead says "Drop to open upload form", the document type there has required fields — the upload window will open so you can fill them before anything files.
Success check: upload one test file through each path. The Capture-page document should land wherever your Index Fields choice sent it (filed, or in the Coding Queue); the Folder Browser batch should appear in the folder immediately with the shared values you entered.