
Set up your first catalog, fields, and document types
Build the structure documents file into — a catalog, its document types, and the fields that describe them — including global fields you define once and reuse everywhere.
At the end of this guide you'll have the three-layer structure everything else builds on: a catalog (the filing cabinet), document types (the kinds of paper in it), and fields (what you'll search and sort by) — with the reuse trick that saves future-you hours: global fields.
The three layers, in one breath
A catalog groups related documents — Accounts Payable, Human Resources. Each catalog holds document types — Purchase Order, Check, W-4. Each type carries fields — Vendor, PO Number, Date — and those fields are what capture fills in, search matches on, and folder-building organizes by.
Step 1: Create the catalog
Go to Administration > Catalogs & Document Types and click New Catalog.
Give it a Name and a short Description. (Later catalogs can start as a copy: Clone from existing catalog brings settings along.)
Click Create.
Step 2: Create a document type
With the catalog selected, click New Document Type — same shape: Name, Description, optional Clone from existing document type ("including all fields and settings," which is exactly how you'll make your second type in thirty seconds).
Click Create. Use Set as Default on the type that captures should assume when nobody chooses.
Step 3: Add the fields
Select the document type and open the Fields tile.
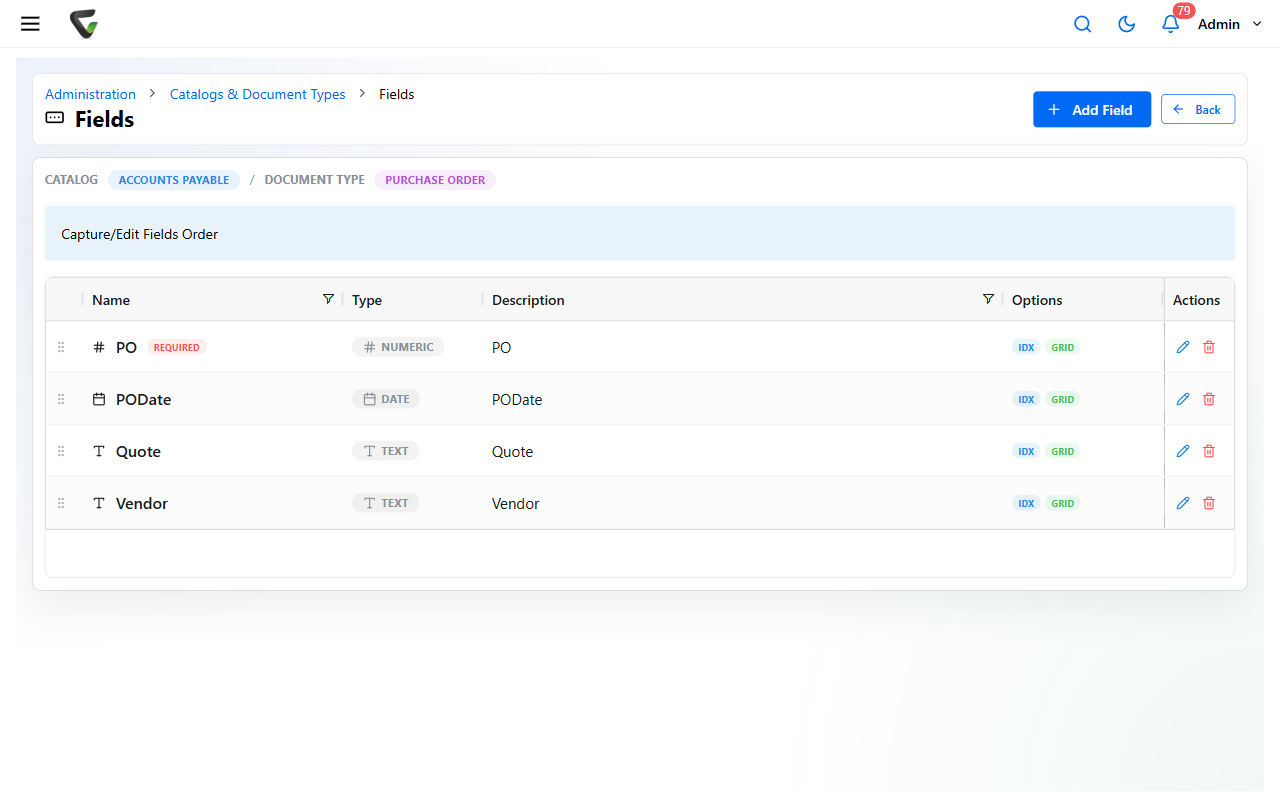
Click Add Field for each one. In the field editor (Manage Field Details):
Name it, and pick the Type — Text, Numeric, or Date.
Pick a Format where it helps: Text offers ready-made masks (phone, SSN, zip codes) or Custom; Date offers two dozen patterns; Numeric can Auto Increment Value — how PO numbers hand themselves out.
Decide the behavior under Field Options: Require entry. for must-fill fields (it can even be conditional on another field having a value), and Disallow duplicate value. to catch double-entered invoices.
For pick-lists: Create drop-down from choices. and type the values into Field Entry Choices (one per line). Two switches control growth: Allow new entries. lets users type values not on the list, and Add new entries to choice list. saves what they type for next time. Lists can also come from an external data source or cascade from a parent field (Choice list depends on field).
Save, then drag the rows on the Fields page into the order people should see.
The reuse trick: global fields
A field like Vendor belongs on purchase orders, checks, and invoices — and searching across all three only works well when it's literally the same field. That's a global field:
Define it once at Administration > Global Fields (Add Field — same editor).
On each document type, add a field and switch on Use Global Field, then pick it. The editor locks the inherited settings and says why: "Field properties are inherited from the selected global field. Only dependency settings can be overridden locally."
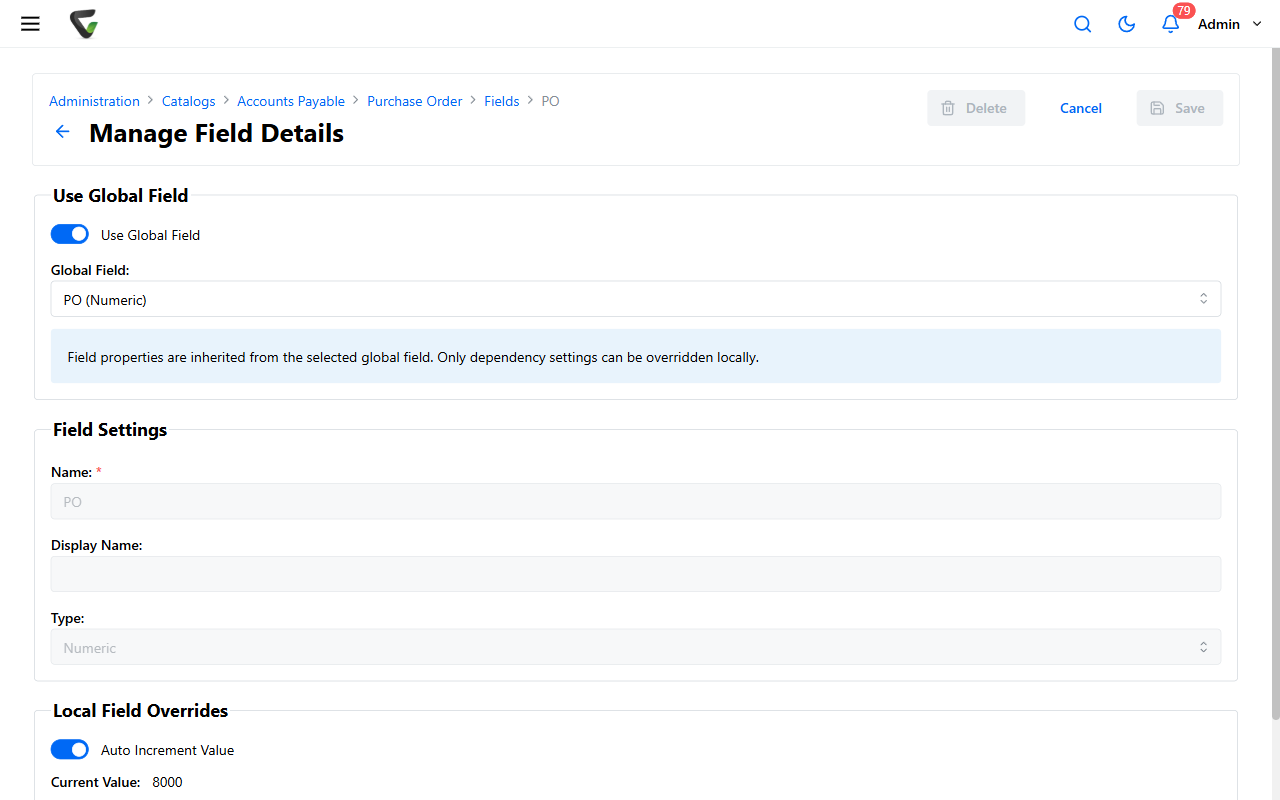
Editing a global field updates every document type that uses it — the editor lists the dependents before you save. That's the feature, and the caution, in one.
Prove the structure
Capture one test document into the new type. Success check: the capture page presents your fields in your order, required ones enforce themselves, and the drop-downs offer your choices.