
Set up an approval process
Route documents of a type through one or more approvers automatically — build the process, choose who approves and in what order, set the group sign-off rule, and test it with a real document.
Before you begin
- Catalog-administrator access to the document type involved
At the end of this guide, documents of one type will enter approval automatically the moment they're filed, land on the right people's Approval tab in the right order, and record every decision — and you'll have proven it with a test document.
Before you build: three decisions
Write these down first — they map directly onto settings you're about to set:
- Who approves, and in what order? Individual people, a group, or the person who created the document.
- For any group step: how many must sign off? One member, a majority, a specific number, or everyone.
- Should every document of this type enter approval on its own, or only when someone starts the process manually?
Step 1: Create the process
Go to Administration > Catalogs & Document Types. In the selectors at the top, pick the Catalog, then the Document Type.
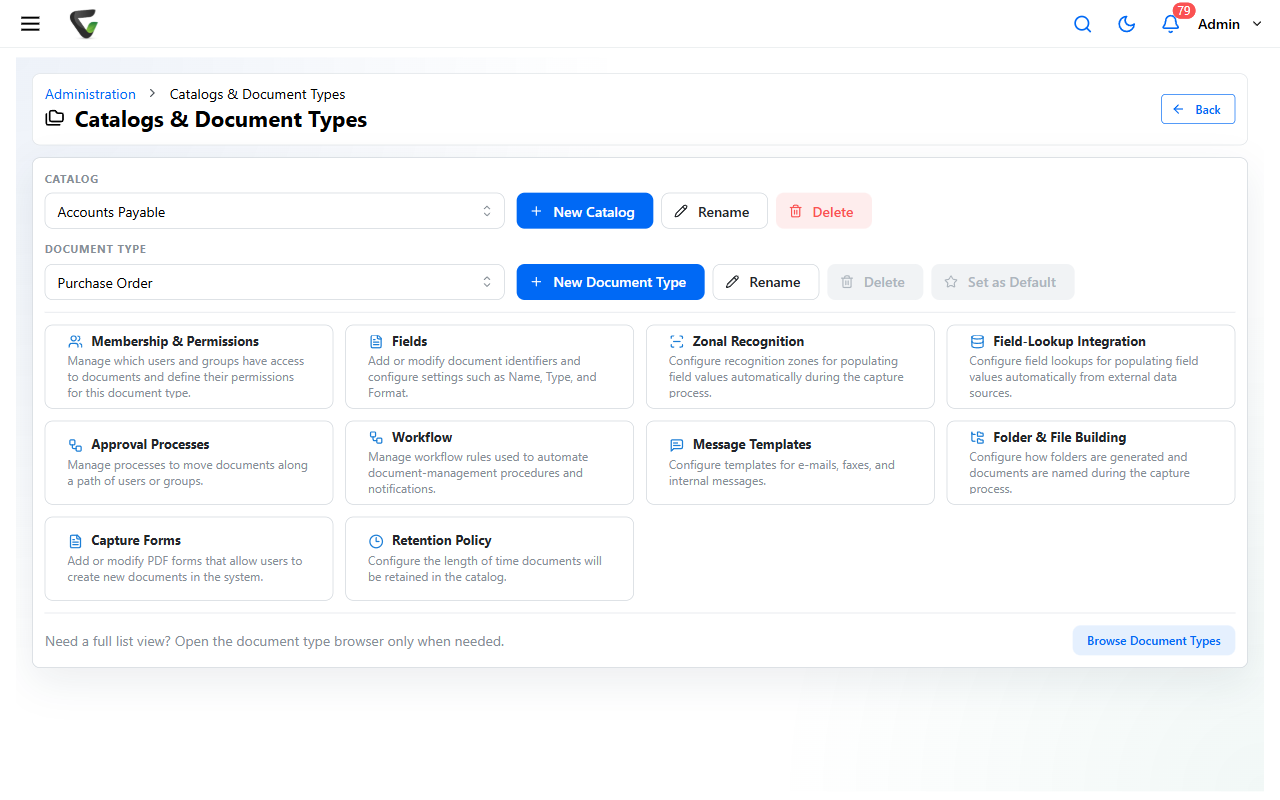
Click the Approval Processes tile ("Manage processes to move documents along a path of users or groups").
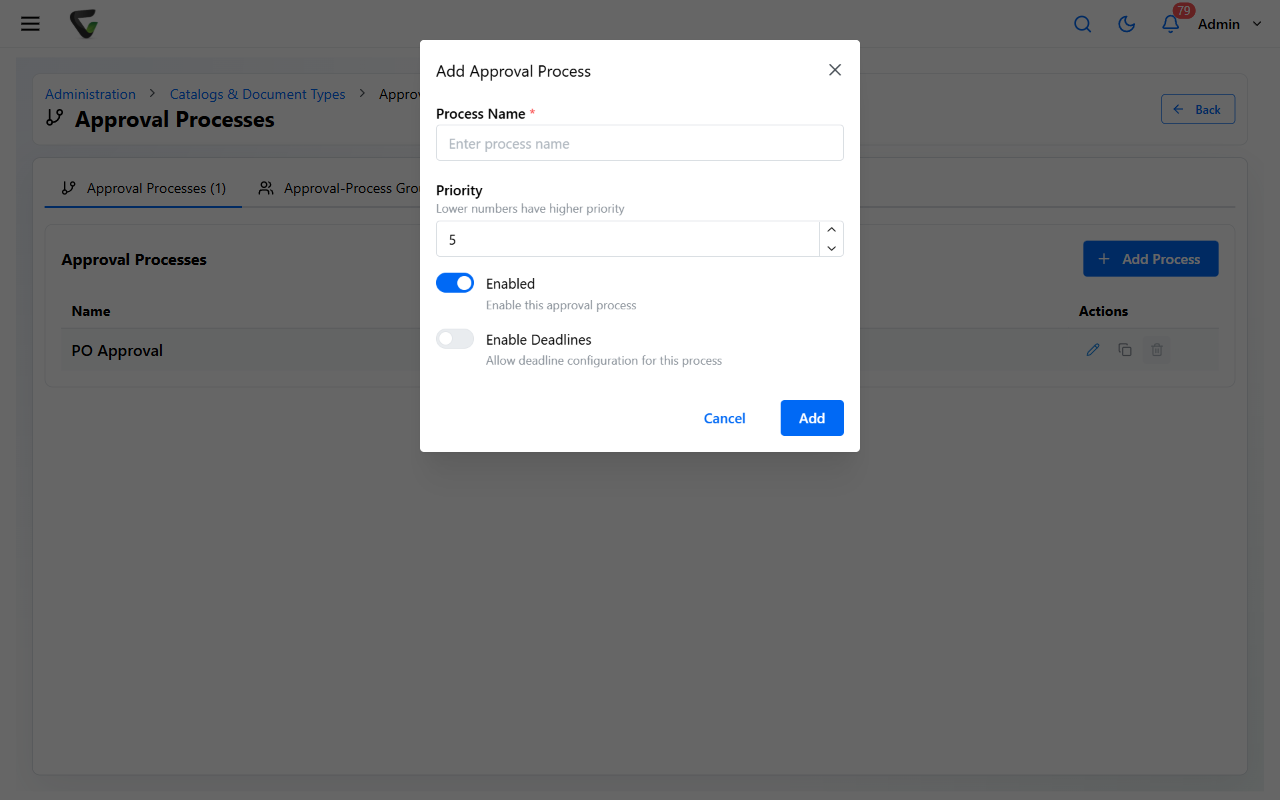
Click Add Process. In the Add Approval Process dialog, enter a Process Name, set the Priority (lower numbers have higher priority when several processes compete), leave Enabled on, and click Add.
What you should see: the process appears in the list with an Enabled badge.
Step 2: Add the members — the path a document travels
Open the process to reach Approval-Process Details.
Click Add Member and choose Add User, Add Group, or Add Created-By User (routes to whoever created the document).
Repeat for each step of the path. Drag to reorder — the top-to-bottom order is the approval order — and use the Start column checkbox to set where new assignments begin.
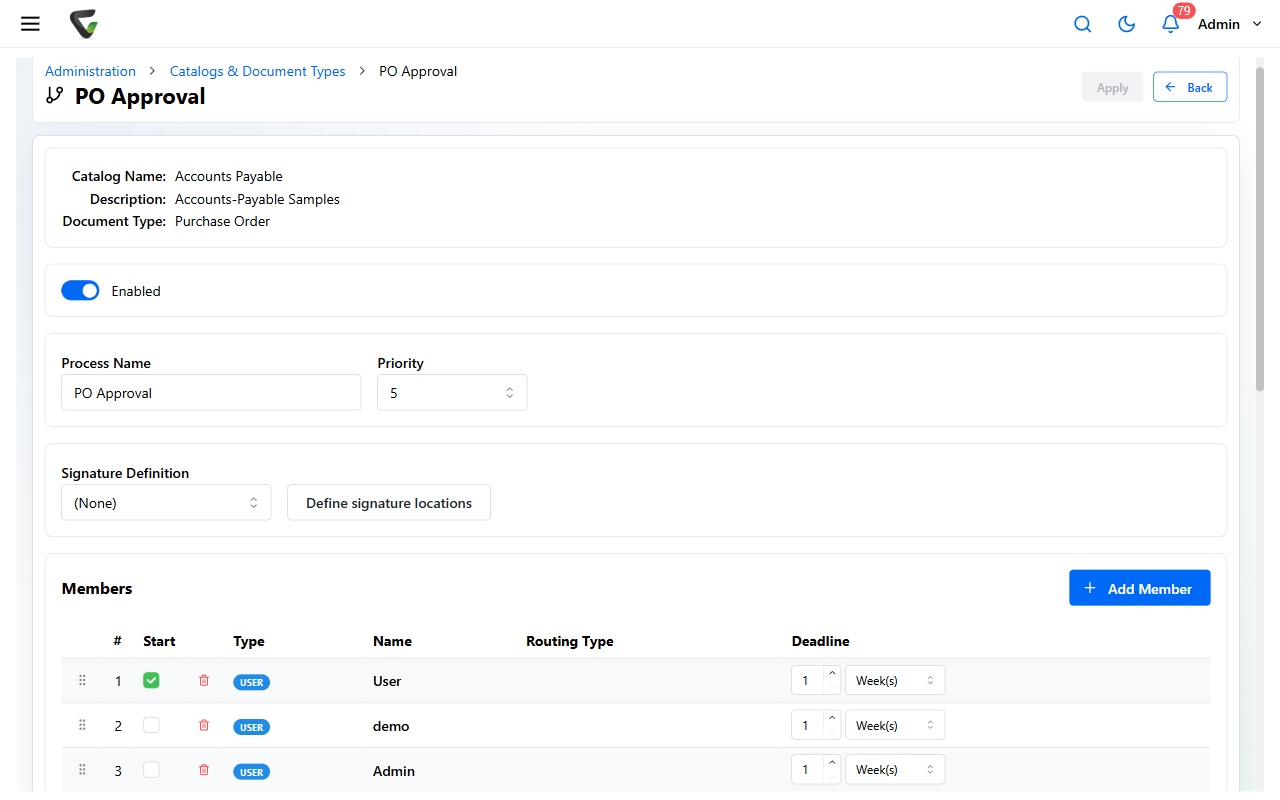
A group member needs a Routing Type: Multi (all members see the item; your sign-off rule decides when it advances), Single (one chosen member), or Review (two peer reviewers).
Step 3: Set the group sign-off rule
For any Multi group, choose the rule under Approval Requirement for Multi-User Groups:
| Option | Advances when |
|---|---|
| Single user in group | Any one member approves |
| Majority of users in group | More than half approve |
| Specified number of users in group | The number you enter in the member's Approval Req column approve |
| All users in group | Every member approves |
A matching Rejection Requirement for Multi-User Groups controls how many rejections stop the document.
All users in group stalls completely when one member is away or has left the company. If you choose it, decide now who maintains the member list when staff change.
Step 4: Make it automatic — or not
In the Options section:
Check Automatically start this process on all captured content of this document type if every filed document of this type should enter approval on its own. Leave it unchecked to start the process manually per document or from a workflow rule.
Consider Require note on all assignments and stage changes — with it on, approvers must write a note as they act. (Rejections prompt for a reason either way.)
Pick the notification behavior: Notify member of new arrivals, and optionally Include Approve and Reject links in arrival notification.
Approval processes attach to filed documents. An item sitting in the Coding Queue enters this process only at the moment it's committed to the catalog — it will never appear in anyone's Approval Queue before then.
Step 5 (optional): Stamps and PINs
- To stamp the document at sign-off, choose a Signature Definition on the details page and use Define signature locations to place it.
- To require a PIN at the moment of approval, that's system-wide, not per process: Administration > System Settings > Approval-Process Settings > Require PIN for Approval. Mind the warning next to PIN Length — changing it resets every user's PIN.
Step 6: Test with a real document
Capture or file one document of this type.
Ask the first member to check Queues — the item should be on their Approval tab.
Have them approve it, then open the document's View History.
Success check: the history shows the process name, the step, who acted, and when — and the item moved to the next member (or left the queue, if the path is done).
If the test document never shows up
Work through A document is stuck in — or skipped — approval — it walks the three states (never entered, waiting on someone, finished but lingering) in order. The most common cause on a new process: the auto-start checkbox from Step 4 was left unchecked.